The Ultimate Guide to Testing React Applications

Testing is a crucial part of the development process of building reliable and maintainable React applications. This comprehensive guide will cover everything you need to know about testing React applications, including the types of tests, tools, and best practices.
Table of Contents
Introduction to Testing React Applications
Types of Tests
Unit Tests
Integration Tests
End-to-End Tests
Testing Tools
Jest
React Testing Library
Cypress
Setting Up Your Testing Environment
Writing Unit Tests
Testing Components
Testing Functions and Hooks
Writing Integration Tests
Testing Component Interactions
Testing with Context and Redux
Writing End-to-End Tests
Setting Up Cypress
Writing Cypress Tests
Mocking and Stubbing
Mocking Functions and Modules
Mocking API Calls
Best Practices for Testing React Applications
Conclusion
1. Introduction to Testing React Applications
Testing is the process of verifying that your code works as expected. In React applications, this involves ensuring that components render correctly, handle user interactions, and integrate seamlessly with other parts of the application. Effective testing helps catch bugs early, improves code quality, and increases confidence in your code base.
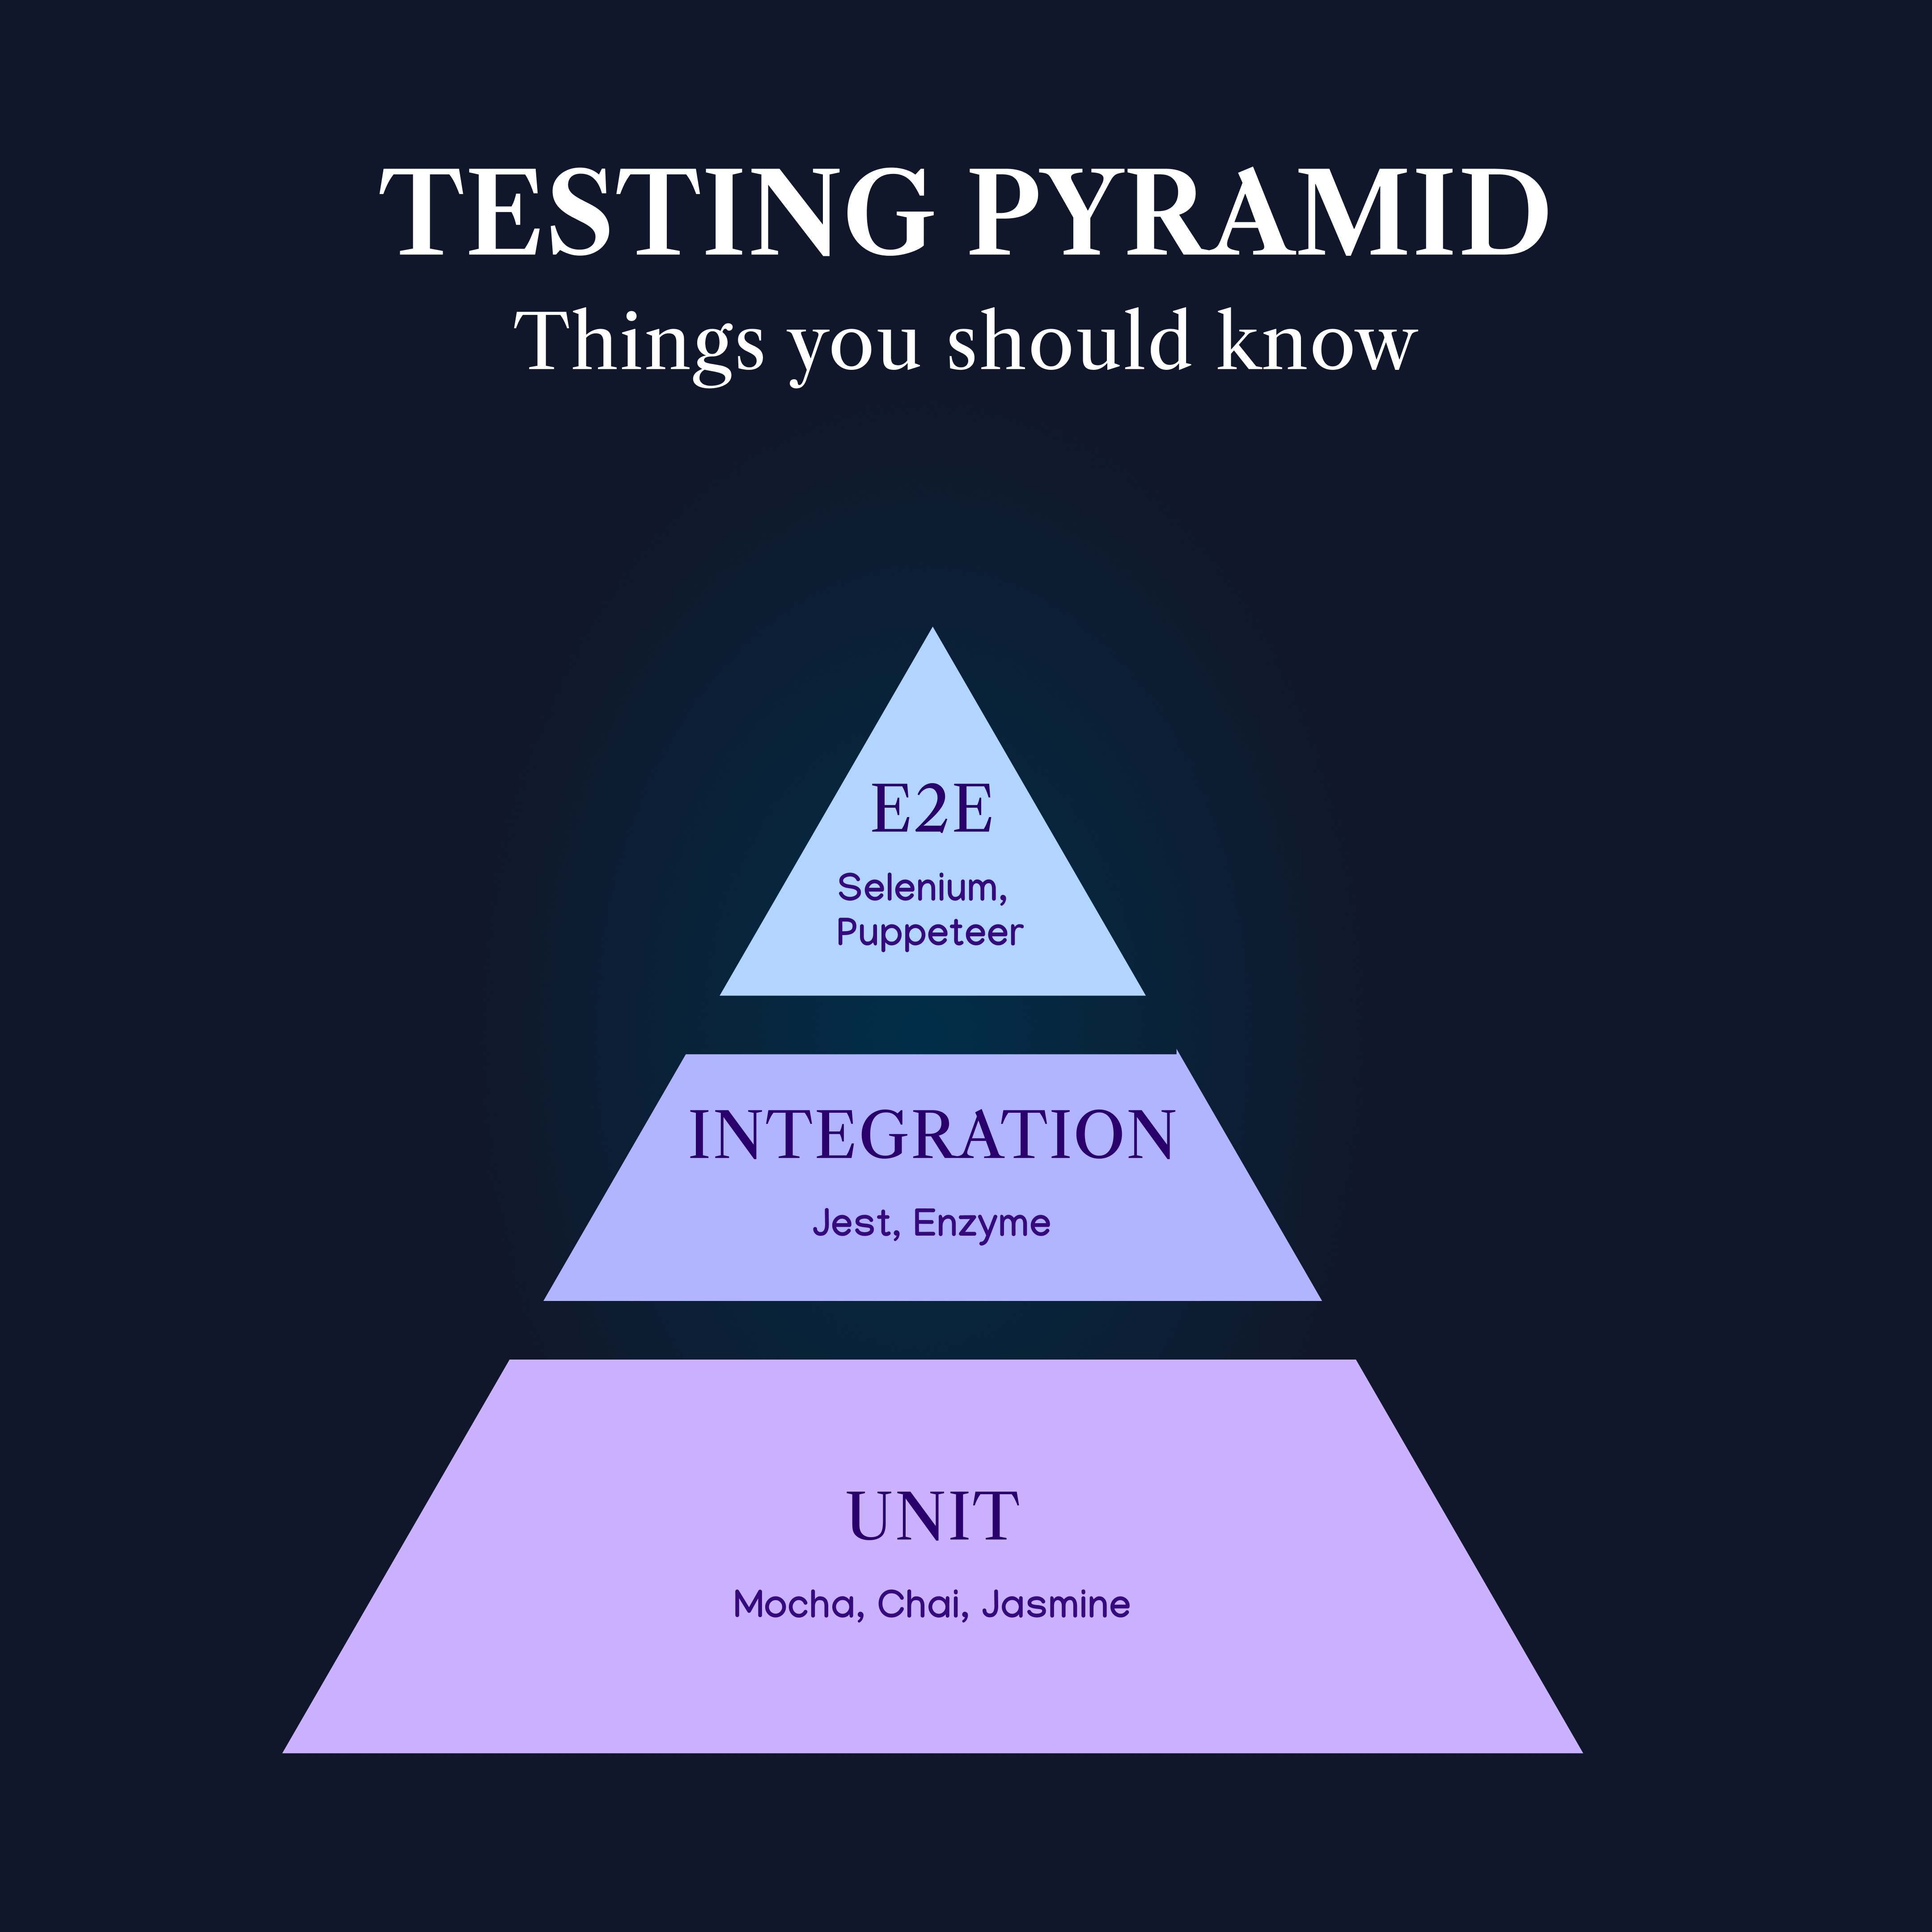
2. Types of Tests
Unit Tests
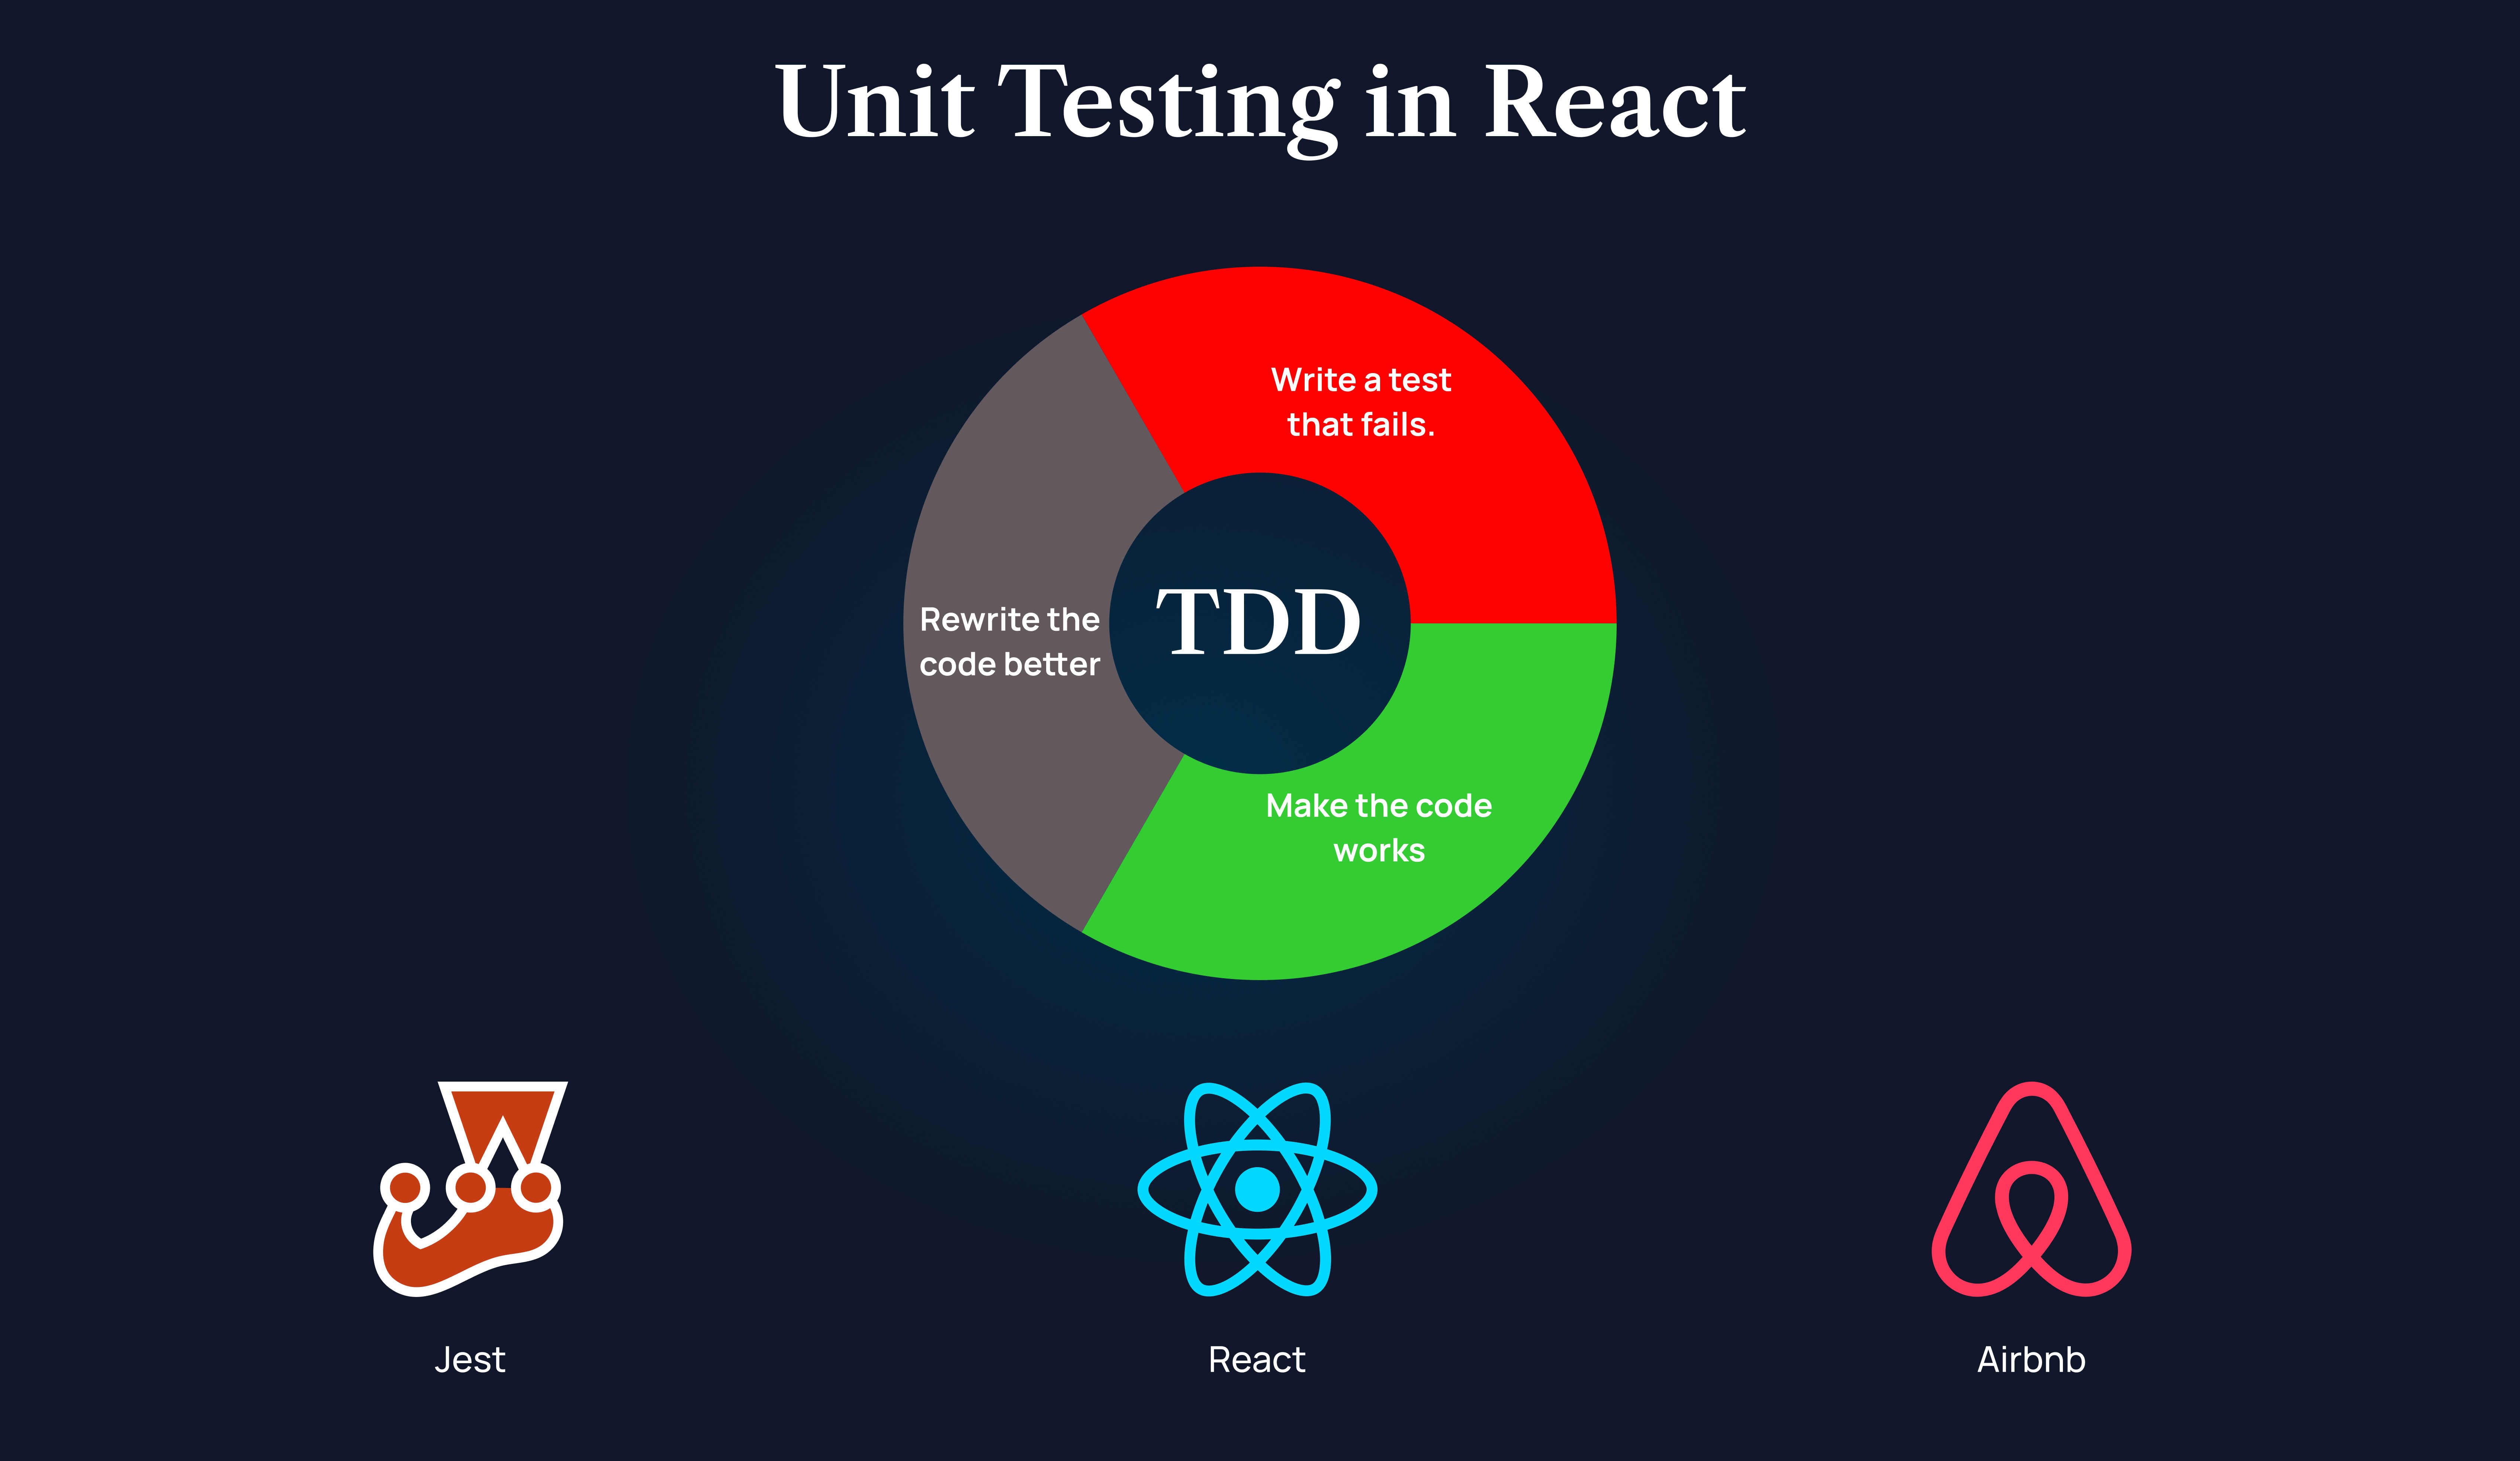
Unit tests focus on testing individual components or functions in isolation. They are the smallest and fastest type of tests, allowing you to verify the correctness of specific units of code without any external dependencies.
Unit testing in a React application is typically done using libraries such as Jest and React Testing Library.
Step-by-step guide on how to set up and write unit tests for a React application:
Setting Up
Create a React Application:
npx create-react-app my-app
cd my-app
2. Install Testing Libraries: React applications created with create-react-app come with Jest and React Testing Library pre-installed. However, if you're adding them to an existing project, you can do so with:
npm install --save-dev jest @testing-library/react @testing-library/jest-dom Running Tests
Run Tests:
npm test
Writing Unit Tests
Creating a Component: Let's create a simple Button component.
// src/components/Button.js
import React from 'react';

const Button = ({ onClick, children }) => {
  return <button onClick={onClick}>{children}</button>;
};

export default Button;
Integration Tests
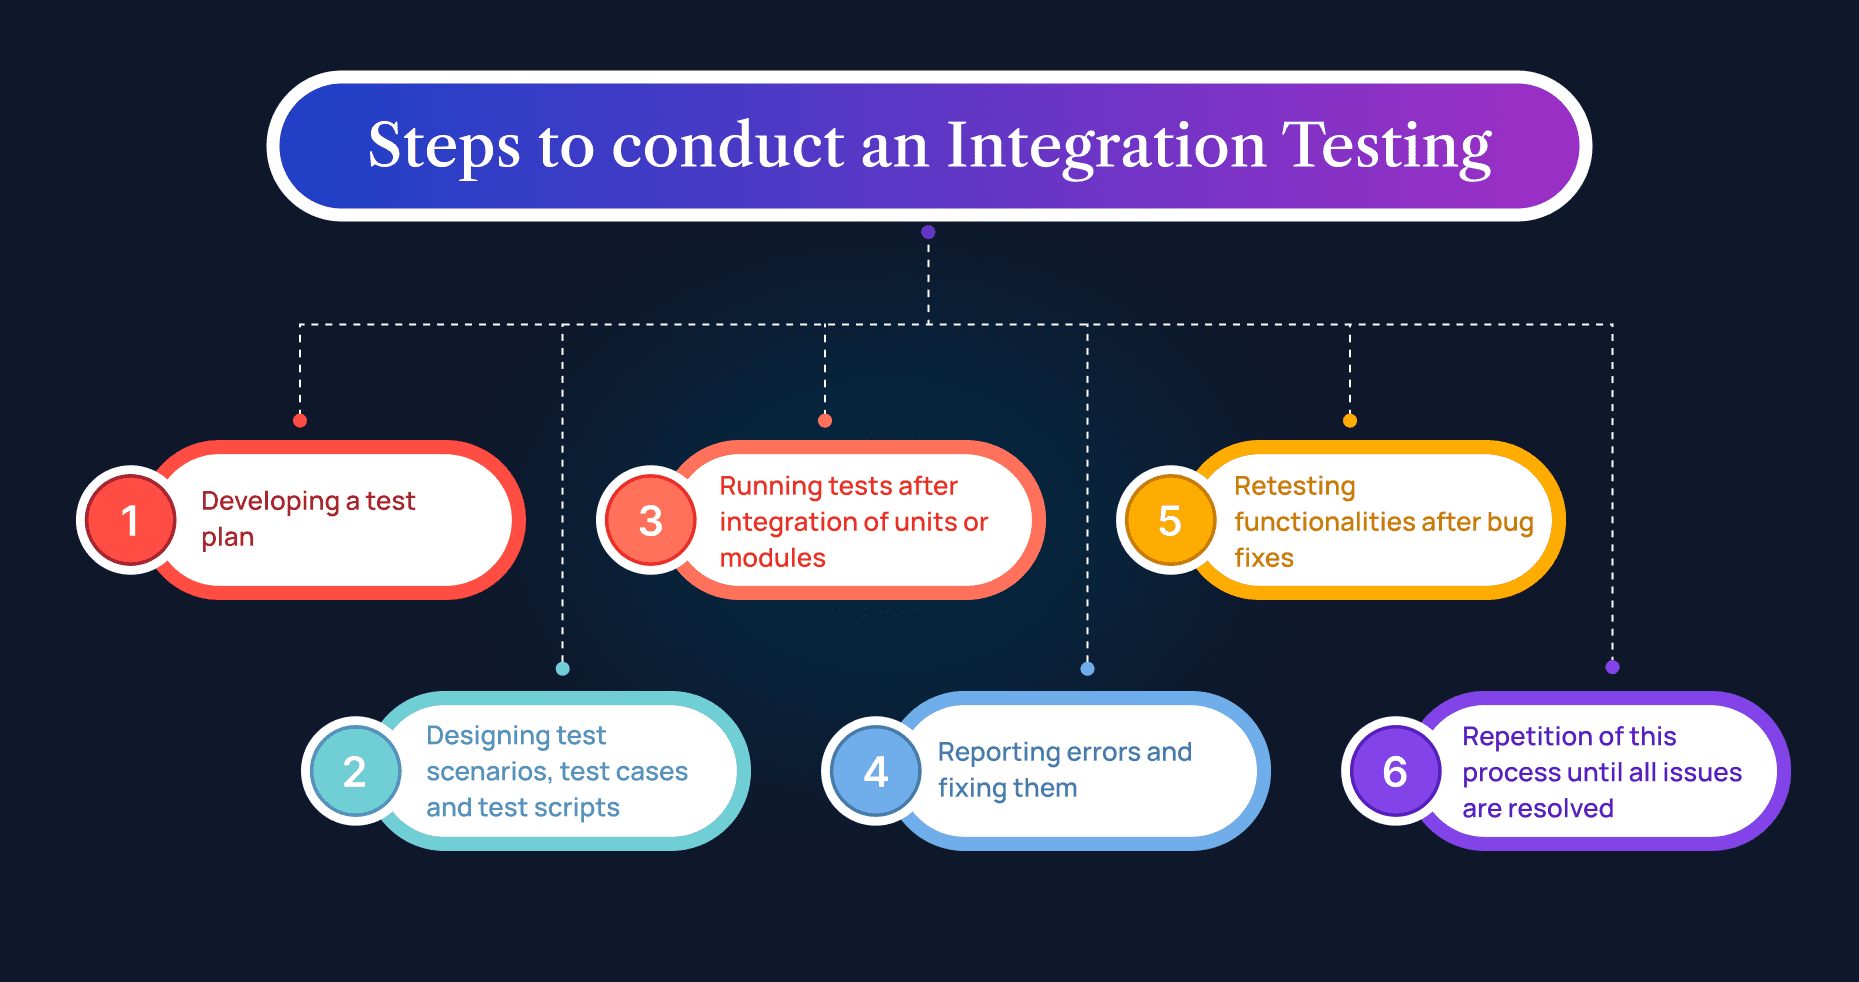
Integration tests verify that different parts of your application work together as expected. These tests often involve multiple components and may include interactions with external systems such as APIs or databases.
Integration testing for a React application involves testing multiple components together to ensure that they work correctly when integrated. You can use testing libraries like Jest and React Testing Library for writing integration tests.
Here's a basic example of an integration test using Jest and React Testing Library:
// src/App.test.js

import React from 'react';
import { render } from '@testing-library/react';
import App from './App';

test('renders App component', () => {
  const { getByText } = render(<App />);

  // Assuming App renders a component with text 'Hello, world!'
  const helloWorldElement = getByText(/Hello, world!/i);
  expect(helloWorldElement).toBeInTheDocument();
});

// Add more integration tests for your components
In this example, we're testing the App component to ensure that it renders correctly. You can add more tests to cover other components and interactions within your application.
Make sure to run your tests using npm test or yarn test depending on your setup, to execute the Jest test runner and see the results.
End-to-End Tests
End-to-end (E2E) tests simulate real user interactions with your application. These tests cover the user interfaces entire application stack, from the UI to the backend, ensuring that the application works correctly from the user's perspective.
One popular tool for E2E testing is Cypress. Here's how you can set up and write E2E tests for a React application using Cypress:
Install Cypress:
If you haven't already installed Cypress, you can do so using npm or yarn:
npm install cypress --save-devor
yarn add cypress --devCreate Cypress Configuration:
Create a cypress.json file in your project's root directory with the following content:
{
  "baseUrl": "http://localhost:3000"  // Update with your app's URL
}
Write E2E Tests:
Create a new directory named cypress in your project's root directory. Inside the cypress directory, create an integration directory.
Create a new test file, for example, app.spec.js, inside the integration directory with the following content:
describe('App', () => {
  it('should display the correct title', () => {
    cy.visit('/');
    cy.get('h1').should('contain', 'Welcome to Your React App');
  });
});
This test visits your application's root URL and asserts that the <h1> element contains the text 'Welcome to Your React App'. Update the selector and assertion as needed for your application.
Run E2E Tests:
Start your React application if it's not already running:
npm startThen, open Cypress:
npx cypress openClick on the app.spec.js test file to run the test. Cypress will open a browser window and execute the test, showing you the results of asynchronous tests in real time.
Additional Configuration:
You can configure Cypress further by adding more plugins, and custom commands, or adjusting the Cypress configuration file ( cypress.json).
CI/CD Integration:
To integrate Cypress tests into your CI/CD pipeline, you can use the Cypress CLI to run tests in headless mode and generate reports.
3. Testing Tools
Jest
Jest is a popular testing framework for JavaScript applications. It provides a robust set of features for writing and running tests, including built-in mocking, code coverage, and snapshot testing.
React Testing Library
React Testing Library is a lightweight library for testing React components. It focuses on testing components from the user's perspective by simulating user interactions and asserting on the rendered output test react components.
Cypress
Cypress is a powerful tool for writing end-to-end tests. It provides a comprehensive set of features for simulating user interactions, making assertions, and debugging tests. Cypress runs tests directly in the browser, offering a real-time, seamless testing experience everywhere.
4. Setting Up Your Testing Environment
To set up your testing environment, you need to install the necessary react testing libraries and tools and configure them for your project. Here's how to set up Jest and React Testing Library in a Create React App project:
Install Jest and React Testing Library:
npm install --save-dev jest @testing-library/react @testing-library/jest-domConfigure Jest:
Create a jest.config.js file in the root of your project:
module.exports = { setupFilesAfterEnv: ['<rootDir>/src/setupTests.js'], testEnvironment: 'jsdom', };Set Up React Testing Library:
Create a src/setupTests.js file:
import '@testing-library/jest-dom';
5. Writing Unit Tests
Testing Components
To write unit tests for React components, you can use React Testing Library to render the component and make assertions on the rendered output of react component. Here's an example of a simple component and its test:
Component:
import React from 'react';
const Greeting = ({ name }) => <div>Hello, {name}!</div>;
export default Greeting;
Test:
import React from 'react';
import { render, screen } from '@testing-library/react';
import Greeting from './Greeting';

test('renders greeting message', () => {
  render(<Greeting name="World" />);
  expect(screen.getByText('Hello, World!')).toBeInTheDocument();
});
Testing Functions and Hooks
You can also write unit tests for functions and custom hooks. Here's an example test asynchronous code with test case of a custom hook and its test:
Hook:
import { useState } from 'react';

const useCounter = (initialValue = 0) => {
  const [count, setCount] = useState(initialValue);
  const increment = () => setCount(count + 1);
  return [count, increment];
};

export default useCounter;
Test:
import { renderHook, act } from '@testing-library/react-hooks';
import useCounter from './useCounter';

test('should increment counter', () => {
  const { result } = renderHook(() => useCounter());
  act(() => {
    result.current[1]();
  });
  expect(result.current[0]).toBe(1);
});With Angular Minds' testing services with the aid of ReactJS web application development, our team ensure catching bugs early and improving code quality.
6. Writing Integration Tests
Testing Component Interactions
Integration tests involve testing how components interact with each other. Here's an example of a parent component that passes a callback to a child component, and its test:
Components:
// ChildComponent.js
import React from 'react';

const ChildComponent = ({ onButtonClick }) => (
  <button onClick={onButtonClick}>Click me</button>
);

export default ChildComponent;

// ParentComponent.js
import React, { useState } from 'react';
import ChildComponent from './ChildComponent';

const ParentComponent = () => {
  const [count, setCount] = useState(0);
  return (
    <div>
      <ChildComponent onButtonClick={() => setCount(count + 1)} />
      <p>Count: {count}</p>
    </div>
  );
};

export default ParentComponent;
Test:
import React from 'react';
import { render, screen, fireEvent } from '@testing-library/react';
import ParentComponent from './ParentComponent';

test('increments count when button is clicked', () => {
  render(<ParentComponent />);
  fireEvent.click(screen.getByText('Click me'));
  expect(screen.getByText('Count: 1')).toBeInTheDocument();
});
Testing with Context and Redux
When using React Context or Redux for state management, you need to wrap your components with the necessary providers first test them in your tests. Here's an example of a Redux-connected component and its test:
Component:
// Counter.js
import React from 'react';
import { useSelector, useDispatch } from 'react-redux';
import { increment } from './counterSlice';

const Counter = () => {
  const count = useSelector((state) => state.counter.value);
  const dispatch = useDispatch();

  return (
    <div>
      <span>{count}</span>
      <button onClick={() => dispatch(increment())}>Increment</button>
    </div>
  );
};

export default Counter;
Test:
import React from 'react';
import { render, screen, fireEvent } from '@testing-library/react';
import { Provider } from 'react-redux';
import { configureStore } from '@reduxjs/toolkit';
import counterReducer from './counterSlice';
import Counter from './Counter';

test('increments count when button is clicked', () => {
  const store = configureStore({ reducer: { counter: counterReducer } });
  render(
    <Provider store={store}>
      <Counter />
    </Provider>
  );
  fireEvent.click(screen.getByText('Increment'));
  expect(screen.getByText('1')).toBeInTheDocument();
});
7. Writing End-to-End Tests
Setting Up Cypress
To set up Cypress, you need to install it and add scripts to your package.json file:
npm install --save-dev cypressAdd the following script to your package.json:
"scripts": {
  "start": "react-scripts start",
  "cy:open": "cypress open"
}
Writing Cypress Tests
Cypress tests are written in the cypress/integration directory. Here's an example of a Cypress test for a simple React application:
Test:
describe('Counter App', () => {
  beforeEach(() => {
    cy.visit('/');
  });

  it('should display initial count', () => {
    cy.contains('Count: 0');
  });

  it('should increment count on button click', () => {
    cy.get('button').click();
    cy.contains('Count: 1');
  });
});
8. Mocking and Stubbing
Mocking Functions and Modules
Mocking allows you to replace functions or modules with mock implementations in your tests. Jest provides built-in support for mocking functions and modules.
Mocking a function:
const mockFunction = jest.fn();
mockFunction.mockReturnValue('mocked value');
expect(mockFunction()).toBe('mocked value');
Mocking a module:
jest.mock('./api', () => ({
  fetchData: jest.fn().mockResolvedValue({ data: 'mocked data' }),
}));
Mocking API Calls
Mocking API calls is essential for testing components that fetch data from a server. You can use Jest to mock API calls in your tests.
Mocking an API call:
import axios from 'axios';
import { render, screen, waitFor } from '@testing-library/react';
import DataFetchingComponent from './DataFetchingComponent';

jest.mock('axios');

test('fetches and displays data', async () => {
  axios.get.mockResolvedValue({ data: 'mocked data' });
  render(<DataFetchingComponent />);
  await waitFor(() => expect(screen.getByText('mocked data')).toBeInTheDocument());
});
9. Best Practices for Testing React Applications
Testing React applications effectively involves a combination of strategies and best practices. Here are some key practices to follow to test react applications:
Write Testable Components
Design components that are easy to test by keeping them small, focused, and loosely coupled. This makes it easier to isolate and test individual components or parts of your application.
Use Testing Libraries
Use libraries like Jest, React Testing Library, or Enzyme for testing. React Testing Library is recommended as a second test because it encourages writing tests that closely resemble how users interact with the application.
Test Behaviour, Not Implementation
Write tests that focus on the behavior of your components rather than their internal implementation details. This makes tests more robust to refactoring and component changes.
Avoid Testing Implementation Details
Avoid testing things like component states or specific methods unless they are critical to the component's behavior. Instead, focus on testing what the user sees and interacts with.
Mock Dependencies
Use Jest's mocking capabilities to mock external dependencies such as API calls or modules. This ensures that your tests remain isolated and do not rely on any external libraries or services.
Use Snapshot Testing Wisely
Snapshot testing can be useful for capturing the output of a component and detecting unexpected changes. However, it should not be used as the sole means of testing asynchronous code, as it can lead to brittle tests.
Test Redux and Context
If you use Redux or Context for state management, ensure that you test your actions, reducers, and context providers/consumers thoroughly. Mocking is particularly important here to isolate these tests.
Write Integration and E2E Tests
In addition to unit tests, write integration tests to test how multiple components work together, and end-to-end (E2E) tests to test cases that simulate user interactions across the application.
Run Tests Locally and in CI/CD
Run your tests locally before committing your code to catch any issues early. Integrate your tests into your CI/CD pipeline to ensure that tests are run automatically on each build.
Monitor Test Coverage
Use tools like Istanbul or Jest's built-in code coverage tools and reporting to monitor your test coverage. Aim for high coverage, but also ensure that your tests are meaningful and cover critical parts of your application.
Following these best practices will help you write more reliable, maintainable, and effective tests for your React applications.
10. Concluding Thoughts
Testing React applications is essential for ensuring their reliability and maintainability. By understanding the different types of tests, setting up the right tools, using reliable tests, and following best testing practices everywhere, you can create a comprehensive test suite that covers all aspects of your application.
Whether you're writing unit tests, integration tests, or end-to-end tests, the strategies and examples provided in this guide will help you build robust and well-tested React applications.
Also Read: Top 13 React Apps: Popular Apps Built with React

Related articles
AI Integration in React Applications: Building Intelligent UIs with TensorFlow.js and Brain.js