
In Angular, the term "micro front-end" refers to the architectural strategy of dividing a large, massive Angular application into more manageable, independent front-end modules. Each module can be built, deployed, and maintained independently, and each represents a particular feature or functionality of the program.
These days, every company owner wants to provide their customers with a wide array of services in one location. This increases the size of the application due to the addition of multiple functionalities, modules, and pages. It becomes challenging for multiple development teams to collaborate on a project. This is because there may be multiple situations where more than one team is needed to work on a single module, page, or functionality.
In this case, the requirement for Angular Micro Frontends becomes mandatory because, when multiple teams or developers work on the same page, there is a risk that they will overwrite each other's changes or run into conflicts when committing code, which will slow down the release process. In addition, numerous iterations of retesting are required to guarantee that the application is free of errors when it is released.
WebPack5 introduced Module Federation to integrate multiple micro front-ends and is one of the most popular ways to handle micro frontend architecture. Module Federation allows developers to combine separate apps into one Angular application where each separate app is loaded through lazy loading.
So, this approach not only improves development productivity but also boosts the overall performance of the app. To understand Module Federation, let’s create a shell application that hosts multiple remote micro front-ends. The host app helps display specific parts of your shell application using routes during the build process.
Also, understand how you can create a host application and integrate the micro front-end Angular into the homepage application. To build micro frontends using module federation in Angular, you’ll need to follow the process given below.
Phase 01: Setting Up the Angular Projects
Phase 02: Adding UI and Routing in Angular Projects
Phase 03: Configuring Module Federation in Angular
Phase 04: Verify the Implementation
Let's use Angular and Module Federation to create a payment-based Angular application. This application will consist of one shell application and two primary child applications:
HomePage // Shell or Host Application
Billing // 1st micro frontend Application
Reports // 2nd micro frontend Application
Therefore, let’s first create three separate applications.
Step 01: Application Creation
To create two new applications, use the command:
ng new homepage -- routing
ng new billing -- routing
ng new reports -- routing
Step 02: Create a New Module, Components and the UI
Now, let’s build each application in isolation by adding some modules and components to our Angular micro-frontend architecture.
Building the Homepage Application
Always keep in mind that a homepage application is an independent Angular application. Let's build a new Angular application to house our shell:
Let’s create a navigation component in our Homepage app using the command:
ng generate component navbar
ng generate component dashboard
As shown below, the homepage will have a navbar component and dashboard component that of sliding images and text content.
Building the Billing Application
Next, let’s add the billing component to our billing app:
ng generate module billing –routing
ng generate component billing/billing – –flat
The billing micro-frontend will expose the billing module, which consists of a Billing info form.
Building the Reports Application
Next, let’s add the reports information component to our reports app:
ng generate component report – –routing
ng generate component report/report – – flat
The report Angular micro-frontend will expose the report module, which consists of report section.
Step 03: Add Module Federation in Angular
First, install Module Federation on all three applications using the command :
npm i @angular-architects/module-federation@16.0.4NOTE: Please install the module-federation npm version according to your angular version. Here I am using angular 16.
After installing the NPM package now add module-federation for all three applications using the command:
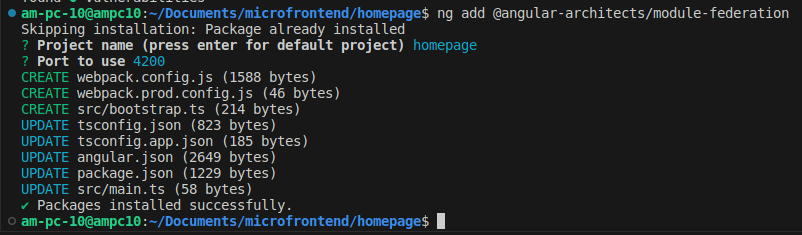
ng add @angular-architects/module-federationThis command will add the webpack.config.js, webpack.prod.config.js and bootstrap.ts files to our application and also modify other existing files as shown in the below image.
Also after entering the command, it will ask for the Project name and Port number, please enter the project name the same as the application name and use a different port number for each application.
Step 01: Add UI content to the Angular applications
Homepage Application
The homepage application consists of:
Navigation Bar for Global rendering
Dashboard to show loading page content
microfrontend/homepage/src/app/app.component.html
Code :
<app-navbar></app-navbar>
<router-outlet></router-outlet>
Also, add HTML for the navbar and dashboard components.
Billing Application
The billing Angular micro-frontend will expose the billing module, which consists of the billing component (billing forms)
Add Ui (billing forms) HTML code in billing/src/app/billing/billing.component.html
Report Application
The report Angular micro-frontend will expose the report module, which consists of the report component (report section)
Add Ui (report section) HTML code in reports/src/app/report/report.component.html
Step 02: Set routing to the Angular applications
It's important to define a route in all the applications. The route basically specifies the angular router which component is to be loaded. Because we're working with Angular micro front-ends, we want to include the components we generated in the root path of each micro front-end project. This is done because, when we ultimately connect the app, we will launch each app using path-based routing, such as /billing and /reports.
Homepage Application
Add code to the homepage/src/app/app-routing.module.ts file
const routes: Routes = [
 {
   path:'',
   redirectTo:'home',
   pathMatch:'full'
 },
 {
   path:'home',
   component: DashbordComponent
 }
];
Billing Application
Add code to the billing/src/app/billing/billing-routing.module.ts file.
const routes: Routes = [
 {
   path: '',
   component:BillingComponent
 },
];
And following the below code in the billing/src/app/app-routing.module.ts file.to load the billing module using the lazy load technique.
const routes: Routes = [
 {
   path: '',
   redirectTo: 'billing',
   pathMatch: 'full'
 },
 {
   path: 'billing',
   loadChildren: () => import('./billing/billing.module').then(m =>
m.BillingModule)
Reports Application
As a billing application, we will load the report module. Add existing code to the reports/src/app/app-routing.module.ts file.
const routes: Routes = [
 {
   path: '',
   redirectTo: 'reports',
   pathMatch: 'full'
 },
 {
   path: 'reports',
   loadChildren: () => import('./report/report.module').then(m => m.ReportModule)
 }
];
And following the below code in the reports/src/app/report/report-routing.module.ts file.
const routes: Routes = [
 {
   path: '',
   component: ReportComponent
 }
];
Step 03 - Verify the implementation of all applications on localhost
Run all three applications using the command :
ng serve -oThis command will compile the code and run it on the local browser.
homepage Application
For me, the homepage application is running on http://localhost:4200/home

Billing Application
For me, the billing application is running on http://localhost:4300/billing

Report Application :
For me, the report application is running on http://localhost:4400/reports

Next, we must configure the two modules we are integrating into the Host application.
Step 1: Expose billing and report modules to be used by the homepage application
Next, we have to expose the modules from our micro-frontends that we aim to use across our Host (homepage) application. So let’s go ahead and expose the module that we just created:
Billing Application
In the billing application, we will expose the billing module.
Make the same changes in the billing/webpack.config.js file.
module.exports = {
 output: {
   uniqueName: "billing",
   publicPath: "auto",
   // Add script type for remove JS Error from console
   scriptType: "text/javascript"
 },
 optimization: {
   runtimeChunk: false
 },
 resolve: {
   alias: {
     ...sharedMappings.getAliases(),
   }
 },
 experiments: {
   outputModule: true
 },
 plugins: [
   new ModuleFederationPlugin({
       // For remotes (please Add 5 this Line)
       name: "billing",
       filename: "remoteEntry.js",
       exposes: {
          './BillingModule': './/src/app/billing/billing.module.ts',
       },

       shared: share({
         "@angular/core": { singleton: true, strictVersion: true,
requiredVersion: 'auto' },
         "@angular/common": { singleton: true, strictVersion: true,
requiredVersion: 'auto' },
         "@angular/common/http": { singleton: true, strictVersion:
true, requiredVersion: 'auto' },
         "@angular/router": { singleton: true, strictVersion: true,
requiredVersion: 'auto' },

         ...sharedMappings.getDescriptors()
       })

   }),   sharedMappings.getPlugin()

 ],
};
We have defined the micro frontend's name in the name field of the code snippet above. The module we want to expose to other apps is contained in the expose attribute. The module's exact path must be specified in the expose object.
Let’s also repeat configuring the webpack.config.js file in the other Angular micro frontend architecture.
Report Application
Make the same changes in the report/webpack.config.js file.
module.exports = {
 output: {
   uniqueName: "report",
   publicPath: "auto",

   // Add script type for remove JS Error from console
   scriptType: "text/javascript"
 },
 optimization: {
   runtimeChunk: false
 },
 resolve: {
   alias: {
     ...sharedMappings.getAliases(),
   }
 },
 experiments: {
   outputModule: true
 },
 plugins: [
   new ModuleFederationPlugin({

       // For remotes (please Add this 5 Line)
       name: "report",
       filename: "remoteEntry.js",
       exposes: {
           './ReportModule': './/src/app/report/report.module.ts',
       },

       shared: share({
         "@angular/core": { singleton: true, strictVersion: true,
requiredVersion: 'auto' },
         "@angular/common": { singleton: true, strictVersion: true,
requiredVersion: 'auto' },
         "@angular/common/http": { singleton: true, strictVersion:
true, requiredVersion: 'auto' },
         "@angular/router": { singleton: true, strictVersion: true,
requiredVersion: 'auto' },

         ...sharedMappings.getDescriptors()
       })

   }),
   sharedMappings.getPlugin()
 ],
};
Step 2: Make changes in the Host (Homepage)Application
Homepage application
module.exports = {
 output: {
   uniqueName: "main",
   publicPath: "auto",
   scriptType: "text/javascript"
 },
 optimization: {
   runtimeChunk: false
 },
 resolve: {
   alias: {
     ...sharedMappings.getAliases(),
   }
 },
 experiments: {
   outputModule: true
 },
 plugins: [
   new ModuleFederationPlugin({

     // For hosts (here we add our remote Applications)
     remotes: {
       "billing": "billing@http://localhost:4300/remoteEntry.js",
       "report": "report@http://localhost:4400/remoteEntry.js",
     },

     shared: share({ ... ,...sharedMappings.getDescriptors()
     })

   }),
   sharedMappings.getPlugin()
 ],
};
We define the micro-frontends we want to incorporate into the field of remote web applications. The billing and report micro-frontends are merged in this example. The path to the file remoteEntry.js, which is generated by Webpack, needs to be included.
Step 3: Create routes for the Host application
Next, we'll create the routes that the host Homepage application will use to load each micro-frontend. Let's proceed to adjust your routing setup on your homepage/Host App as stated below:
In the homepage/src/app/app-routing.module.ts file.
const routes: Routes = [
 {
   path: '',
   redirectTo: 'home',
   pathMatch: 'full'
 },
 {
   path: 'home',
   component: DashbordComponent
 },
 {
   path: 'billing',
   loadChildren: () => {
     return loadRemoteModule({
       remoteEntry: "http://localhost:4300/remoteEntry.js",
       remoteName: 'billing',
       exposedModule: './BillingModule'
     }).then(m => m.BillingModule).catch(error =>
console.log('Error=>', error));
   }
 },
 {
   path: 'reports',
   loadChildren: () => {
     return loadRemoteModule({
       remoteEntry: "http://localhost:4400/remoteEntry.js",
       remoteName: 'report',
       exposedModule: './ReportsModule'
     }).then(m => m.ReportModule).catch(error =>
console.log('Error=>', error)); } } ];
Here, we define two routes for integrating the two applications. We will define the route in the path field, and the load. The Children field contains the module information we are merging.
Step 4: Add render Event in the Global Navigation Bar.
Let's create one navigation-bar component for render to another Angular application
ng generate component billing
above command will create a Navigation Bar Component. Now add the below code to the NavigationBar Component.Also, Add <navigation-bar></navigation-bar> on homepage/src/app/app.component.html
<div class="collapse navbar-collapse" id="navbarTogglerDemo02">
               <ul class="navbar-nav me-auto mb-2 mb-lg-0">
                   <li class="nav-item">
                       <a class="nav-link" routerLink="home">Home</a>
                   </li>
                   <li class="nav-item">
                       <a class="nav-link" routerLink="billing">
Billing</a>
                   </li>
                   <li class="nav-item">
                       <a class="nav-link" routerLink="reports">
Reports</a>
                   </li>
               </ul>
</div>First Save all changes in micro frontends and Host (Homepage) Application.
Next, let’s run our apps and see if it works as expected. First, execute the below commands to run the micro-frontends (child applications).
ng serveNext, execute the below command to run the shell/Host Homepage application.
ng serve Result:
To view the integrated micro-frontends within the host homepage application, navigate to http://localhost:4200 using your browser.
According to the above image, the host homepage application is operating. The integrated front-end applications can be lazy loaded using the previously set routes.
Click on the report button on the navigation bar to see the integrated Billing micro-front-end within the host homepage application.
Click on the report button on the navigation bar to see the integrated Report micro frontend within the host homepage application.
Based on the above image, the shell/host application is running at http://localhost:4200. to navigate the Micro Frontends routes (billing and reports). According to the routes defined earlier. The remote Angular modules will be dynamically loaded and integrated into the main web application shell. Both integrated applications are loading on http://localhost:4200.
Module Federation is one of the keys for micro frontend architectures. It allows the loading of separately compiled applications at runtime. Also, we can share common dependencies. It allows runtime integration. The micro frontend architectures approach turns compile-time dependencies into runtime dependencies.
In general, building micro frontends only makes sense if you want to split a large-scale Angular project into several smaller applications and Module Federation focuses on dynamically loading and sharing modules between different applications at runtime.
For more informational content, visit Angular Minds.


This website uses cookies to analyze website traffic and optimize your website experience. By continuing, you agree to our use of cookies as described in our Privacy Policy.

